
After weeks of feeding, tweaking and keeping an eye on the temperature, you reach a properly satisfying moment. You open the hatch at the base of the bin and there it is. Dark, crumbly, earthy-smelling compost you made yourself from kitchen and garden waste.
A few things tend to catch people out at this stage, though. What the compost actually looks like. What to do with the liquid at the bottom. And how to keep the bin going once you've taken some out.
When is HOTBIN compost ready to harvest?
The bin works in three layers. A hot active zone up top at 50 to 70°C, a middle layer still maturing, and a cooler base where the finished stuff collects. You harvest from that base. It's the oldest material, quietly maturing while you feed the top.
On a new bin the first harvest usually takes 90 to 120 days. After that you can take some every 30 to 90 days. You'll know the base is ready when it's dark brown or black, crumbly or a little sticky, smells earthy, and you can't really make out the original ingredients any more. Bar the odd bit of woodchip or eggshell.
What does finished HOTBIN compost actually look like?
This is the bit that throws people. HOTBIN compost comes out sticky and a bit clumpy, and that's a good sign, not a bad one. It means it's rich in humus, the dark stable matter that holds onto water and nutrients and clings together. That stickiness is exactly what makes it such good stuff for your soil.
You'll also see bits of woodchip that haven't fully broken down, from the cooler base. Perfectly normal. Pick them out and pop them back in the top, or just leave them in and they'll finish off in the ground. Run it through an 8mm sieve and around 80% drops straight through. What you don't want to see is compost that's wet and muddy all the way through, or still showing obvious food scraps, or smelling foul. If it's wet and muddy, mix it with dry paper and woodchip and put it back in the top to go round again.
How to harvest your HOTBIN compost, step by step
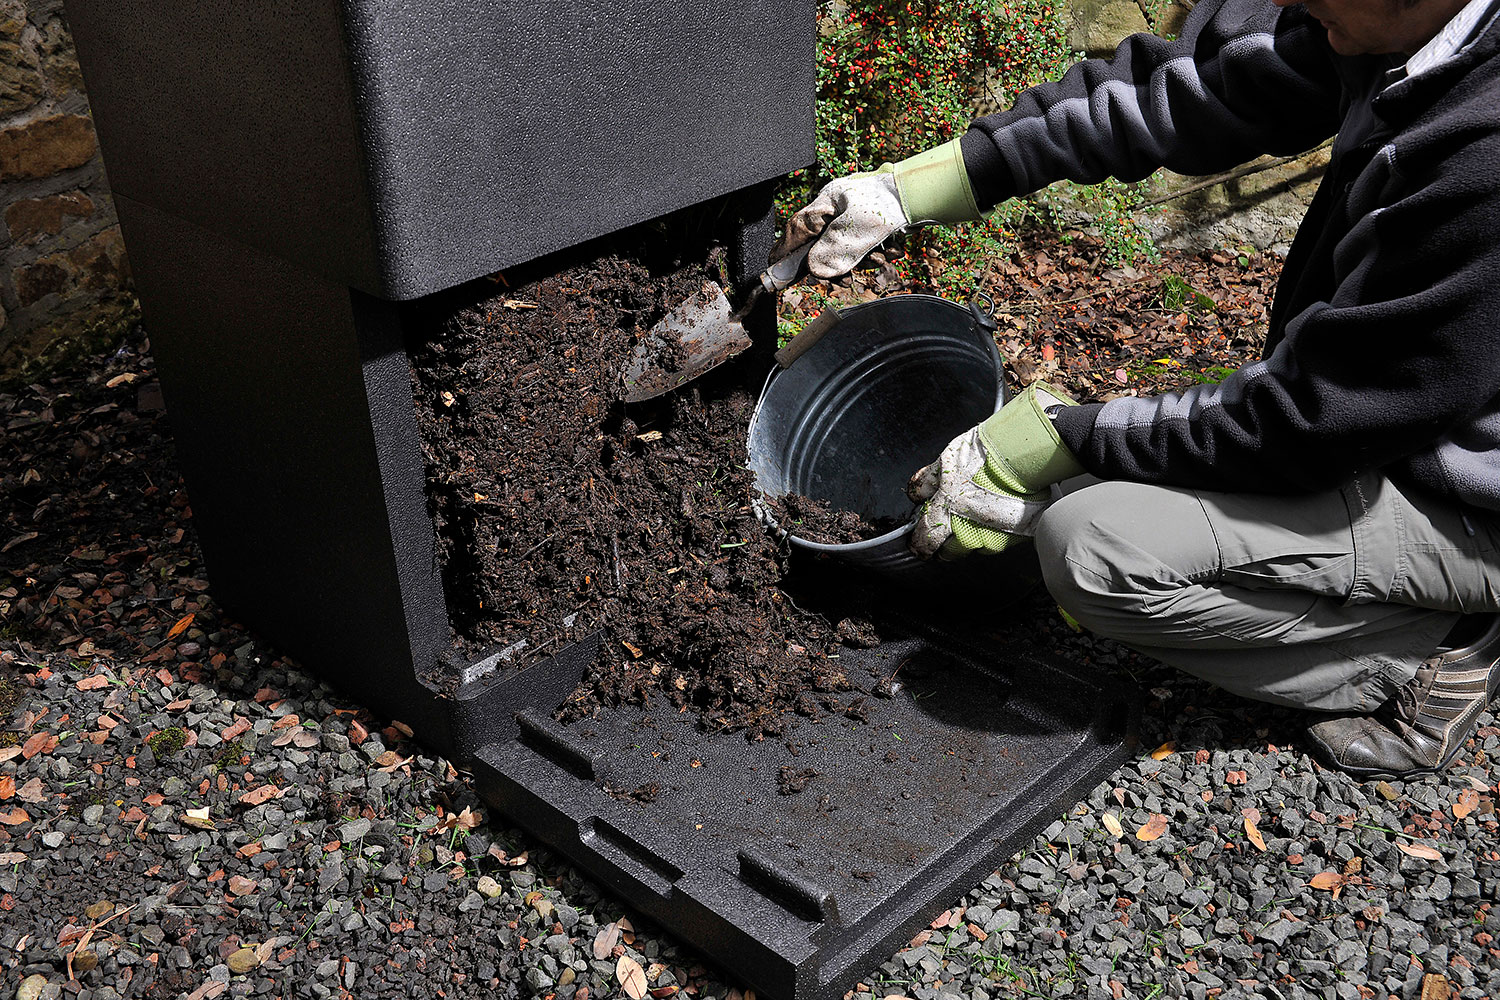
- Feed the top first, to keep the active zone ticking over while you work at the bottom.
- Undo the cam straps and take off the front hatch. If it's stiff, slide a garden fork in just above the opening and lever the weight up a touch, then lift the panel out vertically.
- Scoop the base layer out with a trowel or small fork, starting in the middle where the oldest material sits. Leave a bit round the edges to support what's above.
- Put the hatch back and re-fasten the straps.
- Sieve it if you want it fine, and tip any big bits back in the top.
Try to empty the base every three to six months even if you're not sure it's fully done. Let it build up too long and it compacts the base and chokes off the airflow through the plate.
The liquid fertiliser, and how to use it
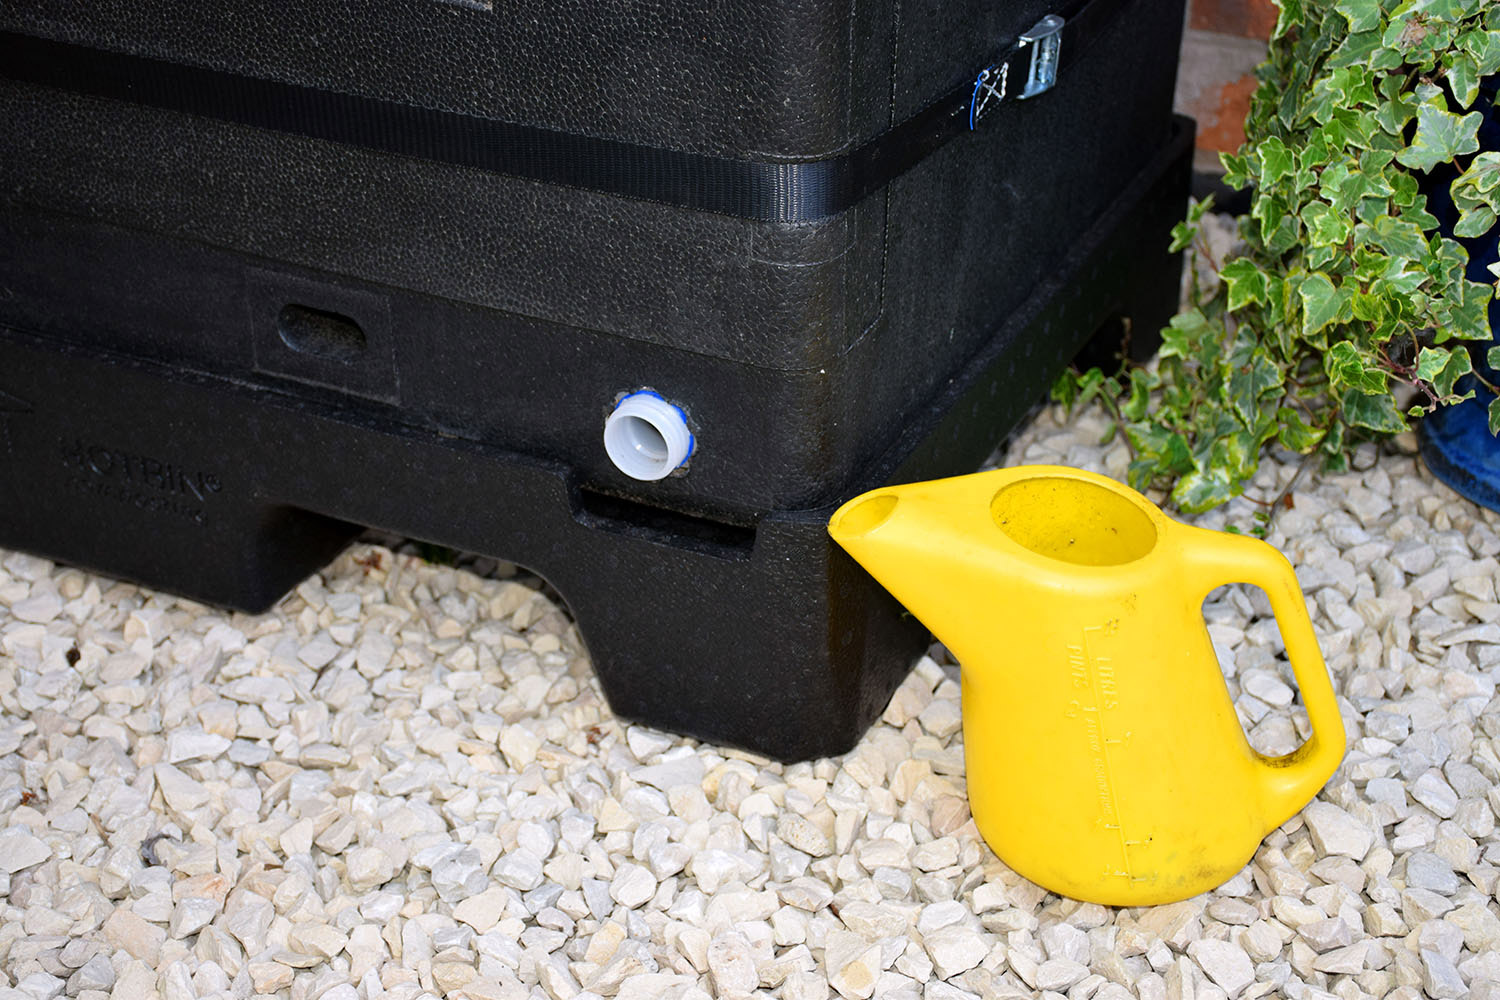
Liquid collects at the base, below the aeration plate. On 2019-onwards models and the Mini you get at it by unscrewing the blue cap and draining it into a container. A plinth lifts the bin by 125mm, which makes this a lot easier.
This liquid is leachate, and it's potent stuff. Don't put it on neat. Dilute it one part liquid to ten parts water and pour it round the base of your plants rather than over the leaves. Good leachate is dark brown and smells earthy. If it's yellow, fruity-smelling, black or slimy, the bin's gone airless at some point, so tip that batch away and sort the conditions out first.
One on food safety: after you've fed an edible crop with leachate or compost, leave it at least 20 days before harvesting, and give produce a good wash before eating. Wear gloves when you're handling the liquid, and use it within 12 months.
Ten ways to use your finished compost and liquid feed
- Dig it into veg beds before sowing. A 5 to 7cm layer worked into the topsoil.
- Use it as a mulch round shrubs, fruit trees and perennials. A 3 to 5cm layer, not touching the stems.
- Top-dress the lawn in autumn with a thin, well-sieved layer.
- Mix it into potting compost. Around a quarter to a third, so it's not too rich for seedlings.
- Work it into heavy clay over a few seasons to improve drainage and make it easier to dig.
- Work it into sandy soil to help it hold water and stop nutrients washing away.
- Mulch round fruit trees and soft fruit in late winter or early spring, before new growth.
- Drop a little into the base of new planting holes to give transplants a strong start.
- Make a simple compost steep. Soak a couple of handfuls in water for a day or two, strain, dilute well, and water it round established plants. (This is just a steep, separate from the leachate that drains out the bottom.)
- Store it slightly damp under a tarpaulin or in closed bags. It'll keep nicely for a season.
For the liquid feed, dilute one to ten and pour it round established veg, fruit and flowering plants. Hungry crops like tomatoes, courgettes and brassicas love it. Steer clear of seedlings though, even diluted it's too strong for them.
Keeping the bin going after harvest
Once you've cleared the base the bin will look quite a bit emptier. That's normal, composting shrinks the volume by around 70 to 80%. Give it a bigger feed than usual to wake the active zone back up. Fresh greens, plenty of shredded paper, plenty of woodchip. The temperature might dip for a day or two and then climb back. The best part of a well-run HOTBIN isn't really the compost anyway. It's the closed loop. Your waste turning into something genuinely useful.
Shop the HOTBIN range
Further reading
Adam

I'm Adam, the founder of Compost Guy. I'm passionate about empowering people to embrace composting! Whether you're a seasoned composter or just starting your journey, I'm here to help.


